This is a follow-up to my original Novum keyboard
post. I have used the first revision as my daily driver for about two years now,
which is long enough to figure out what works and what doesn't.
The short version is that rev1 generally worked. I have really enjoyed the main
layout. However, two thumb-cluster details kept annoying me: the outermost thumb
key was awkward to reach, and my modifier setup was not quite reliable enough
for fast shortcuts. So rev2 is about fine-tuning the thumb cluster.
 Novum rev2.
The rev2 files are available in the repo.
What Still Worked
For rev1, the biggest positive outcome was that the actual matrix layout felt
right. I did not find myself wanting to move the columns or return to the
Lily58. The keyboard did what I wanted it to do.
The problems were more specific. The curved thumb cluster was mostly fine, but
the outermost key was too far out. Reaching it with my thumb was awkward because
my hand and arm were already covering the area where the thumb wanted to move.
It was technically reachable, but not in a way that made the key feel useful.
The second problem was the modifier mapping. In rev1, I had Command on one side
and Ctrl on the other, with
home row mods filling in the
rest. This worked for maybe 95% of normal use, which sounds good until the other
5% kicks in and stops your flow.
Home row mods were not bad in general, and I like the overall idea. They worked
well for shortcuts where I naturally hold the modifier for a moment. They were
much worse for very quick chained shortcuts. The obvious example is my Ctrl+a
tmux prefix. When typing that quickly, I could end up with something like
fa... instead of the intended control sequence. I tried tuning the timings,
but I never found settings that felt seamless for my use.
At some point the reasonable conclusion was that the layout needed dedicated
Ctrl and Command keys on the thumb cluster.
Upgrading the Thumb Cluster
I started with the part that had actually bothered me. The thumb cluster moved
inward by one key. That already puts the cluster close to the maximum width I
would want, so I did not want to solve the missing-key problem by adding another
key to the outside.
Instead, the extra key went below the second innermost thumb key. This gives me
one more useful thumb position while keeping the cluster compact.
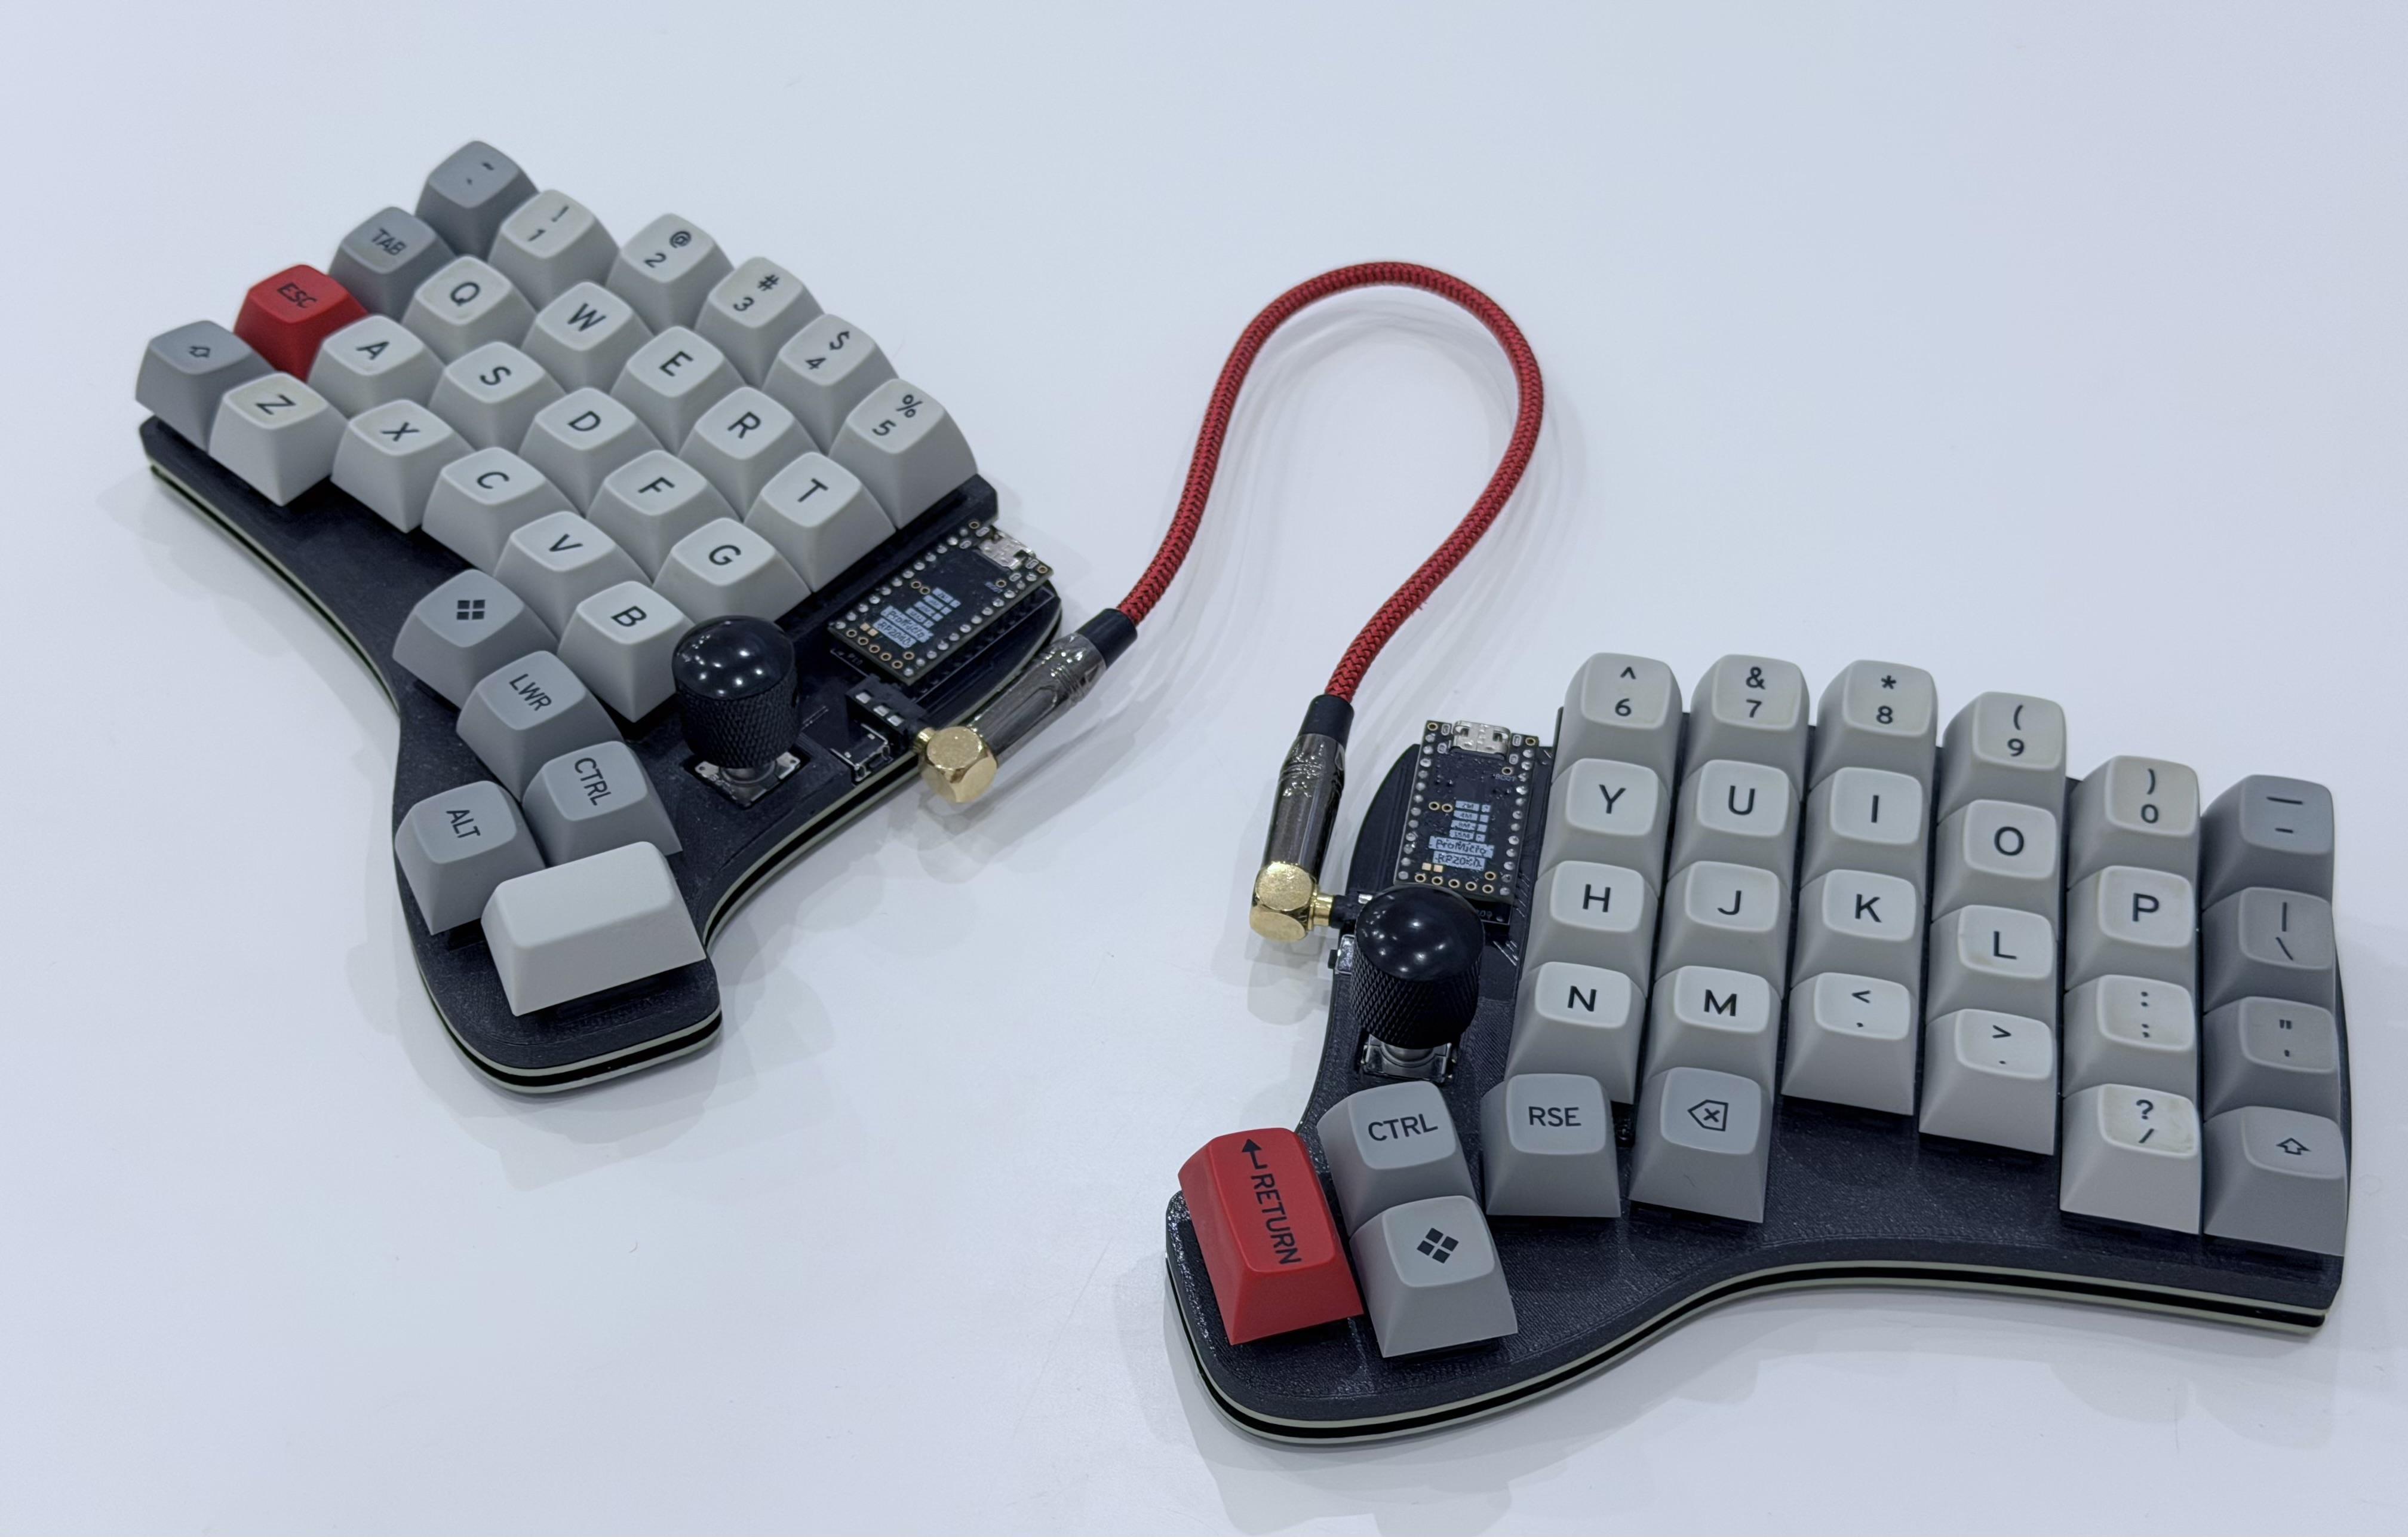
 Rev1 and rev2 side
by side. The main layout stayed the same, but the thumb cluster moved inward and
gained one key.
Rev1 and rev2 side
by side. The main layout stayed the same, but the thumb cluster moved inward and
gained one key.
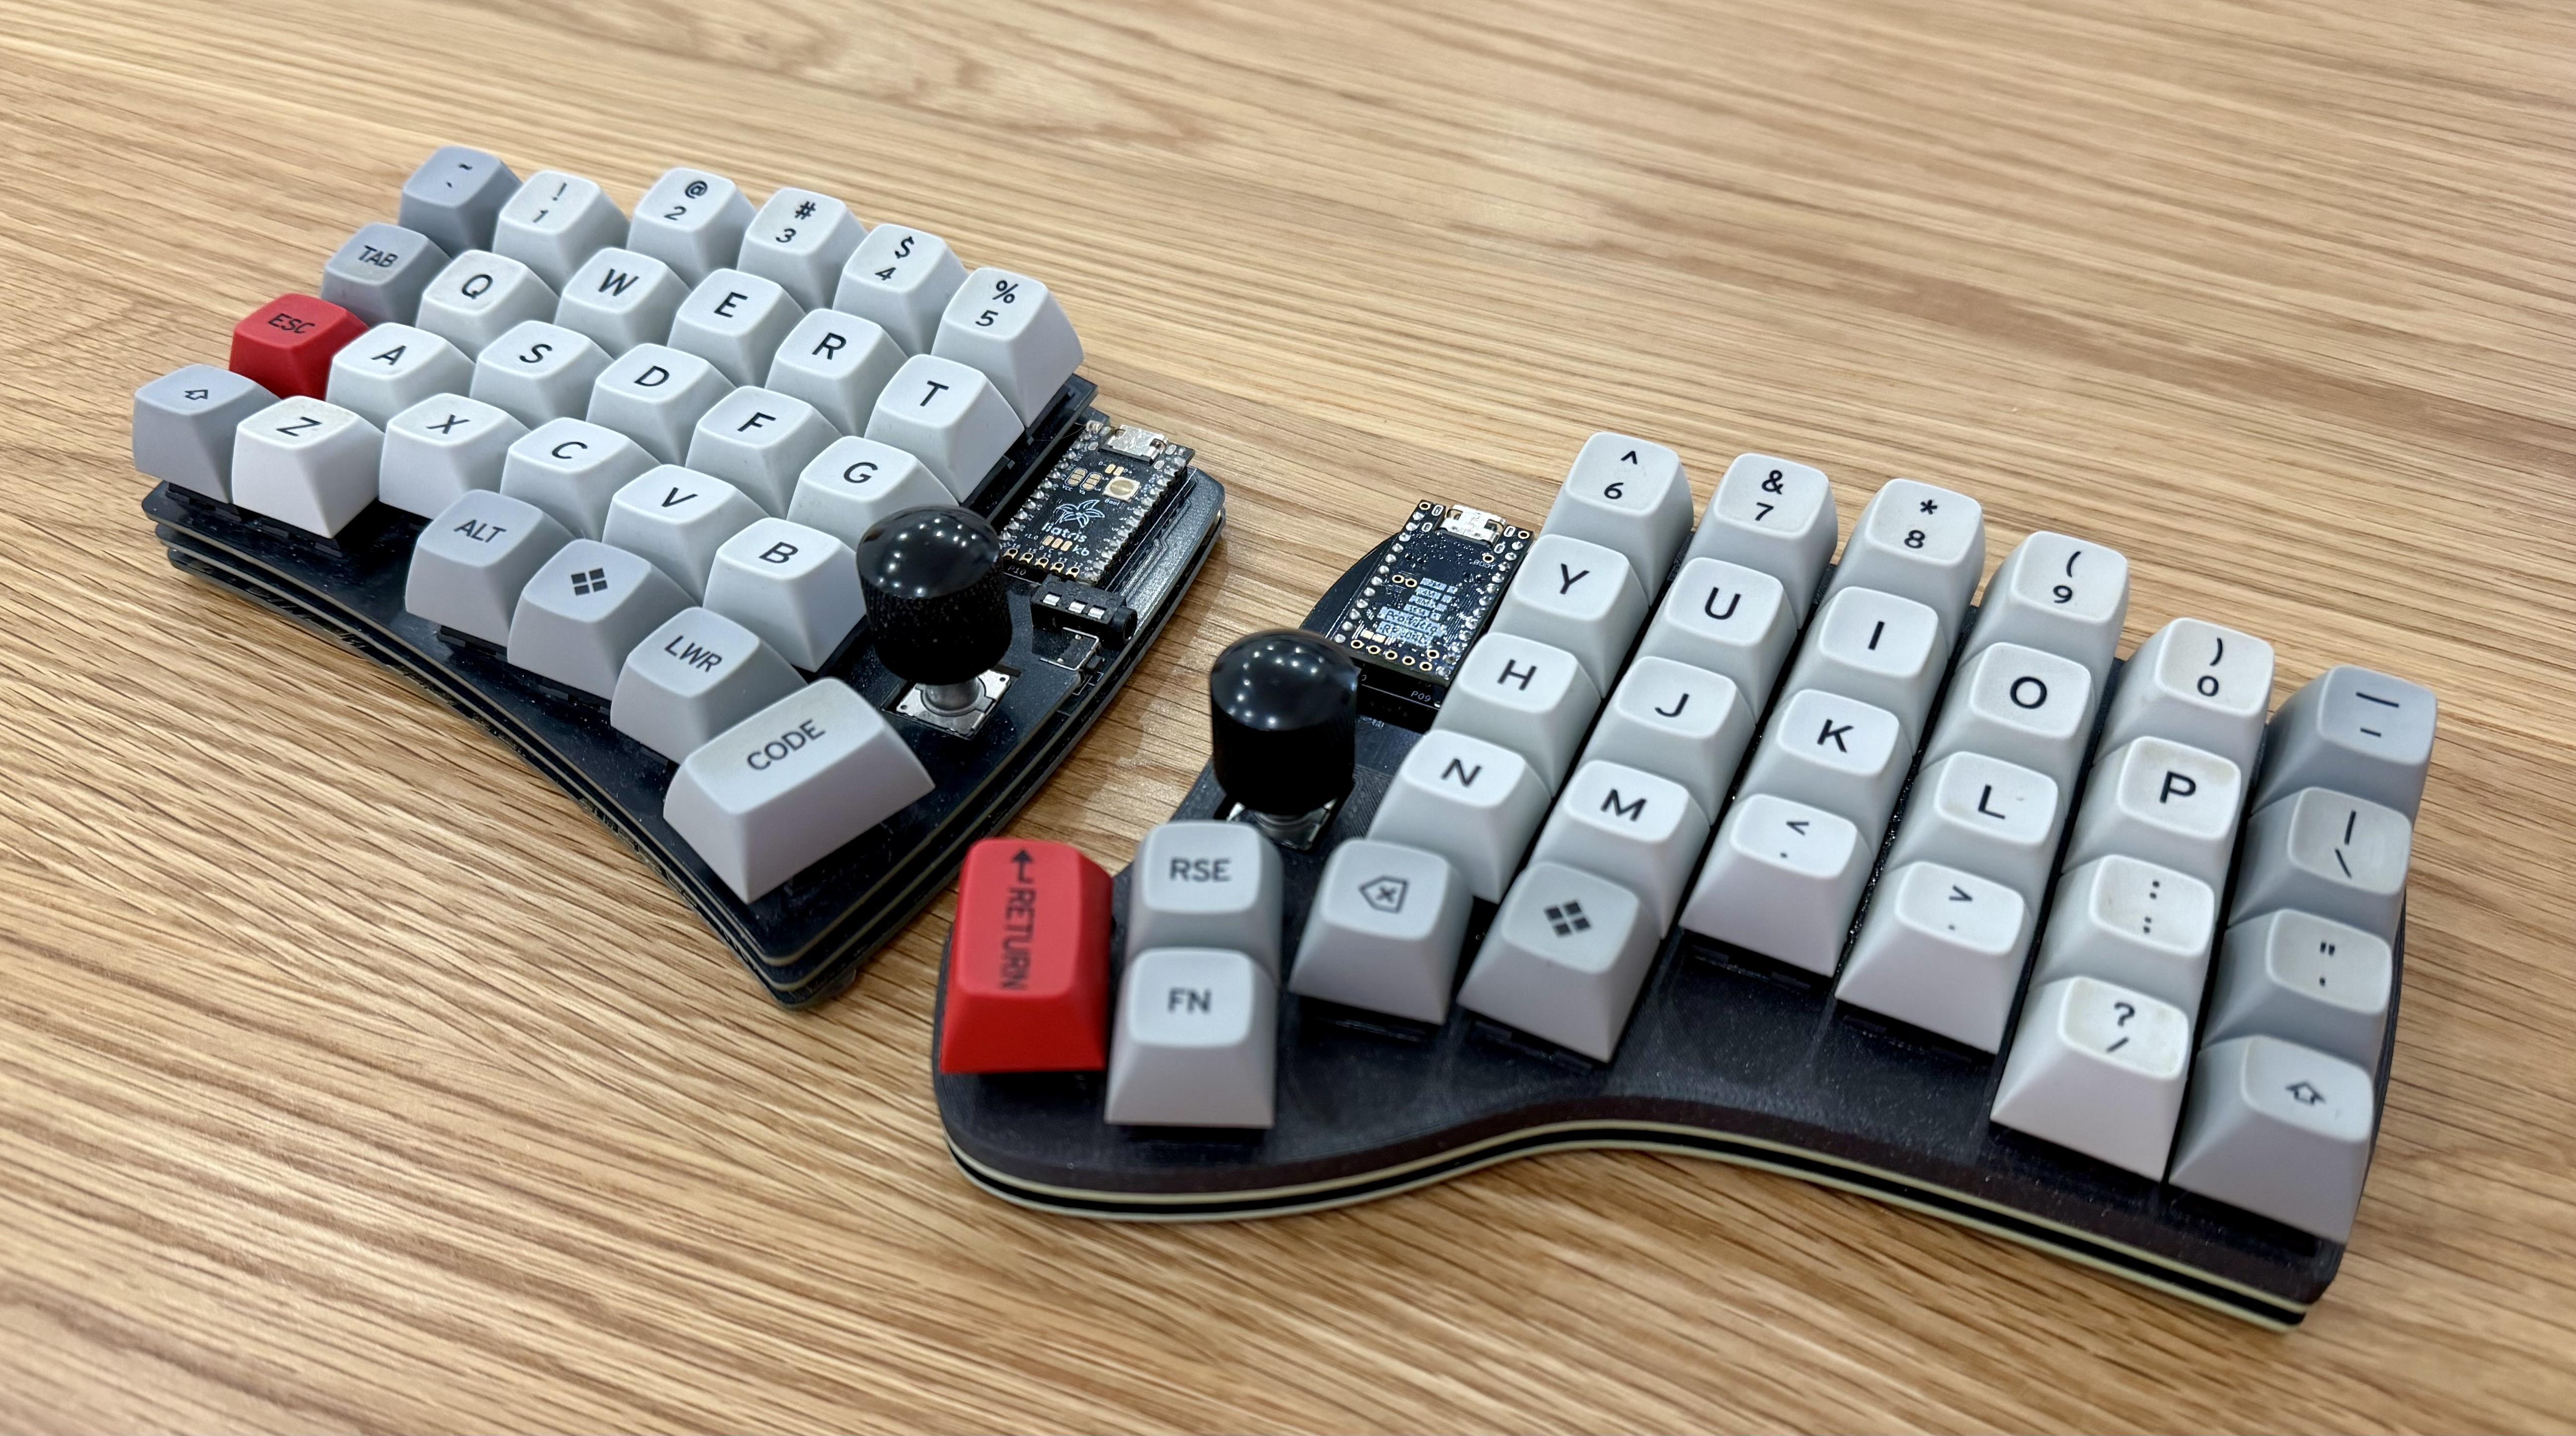
The keymap change follows from that. Rev1 already had Ctrl and Command in the
thumb cluster, but not symmetrically on both halves. The new cluster gives both
halves dedicated access to both modifiers, so fast shortcuts no longer depend on
timing-sensitive home row holds. The exact keymap may still change while I keep
experimenting with it, but that is the important change.
 The current rev2 keymap.
The Boring Payoff
I spent quite a bit of time on the original Novum
build pipeline.
At the time, it was easy to ask whether that was over-engineering for a personal
keyboard project. For rev2, the answer was clearer: that work paid off.
Most of the thumb-cluster change was just updating the layout model and letting
the existing pipeline regenerate the boring parts: outlines, PCBs, QMK and Vial
definitions, and release artifacts. There were still small fixes here and there,
but the basic idea worked. The important part is that I did not have to manually
keep the physical layout, PCB matrix, firmware matrix, and rendered artifacts in
sync.
That does not mean everything was magically handled by Ergogen. The new outline
was complex enough that I hit the limits of what I wanted to express directly in
the Ergogen config. The workaround was to draw the board outline in CAD around
the generated key placement, export it as DXF, and then feed it back into the
build.
I added a small
helper script
for that. It reads the DXF outline, stitches the geometry together, and updates
the generated outline block in the Ergogen config. So the outline is still part
of the generated process, even if the shape itself starts in a CAD tool.
Because the outline changed, the bottom-board art had to be revisited as well. I
redid the artwork, or more accurately, had AI redo it for me, and added another
helper script
to convert it into the raw Ergogen artwork footprint. Manually keeping PCB art
aligned is exactly the kind of thing I do not want to do twice.
Putting It Together
PCBWay reached out and offered to sponsor the PCB
order for this revision. They covered the manufacturing and shipping for the
boards, but did not ask for any particular conclusion or wording in return.
For this build, I decided to order the main PCBs + bottom boards, and 3D-print
the switch plates. The PCBs use the same style as rev1: black solder mask and
ENIG surface finish to give it a much nicer final look.
The bottom board is also not a very normal PCB. It has a large exposed-copper
artwork area and plenty of small shapes that are not typical for a simple board.
With rev1, I had some issues uploading the bottom board design, but PCBWay
handled these files without any problems. The design still needed manual
acceptance before manufacturing, which was expected, and after that the boards
were fabricated without issues.
The overall PCB quality was good, and the finish looked clean. I was a little
worried about the small details in the bottom-board artwork, but they came
through as designed. More importantly, there were no board-related surprises
when I assembled the keyboard. The gold finish really makes the exposed copper
artwork shine, as shown below.
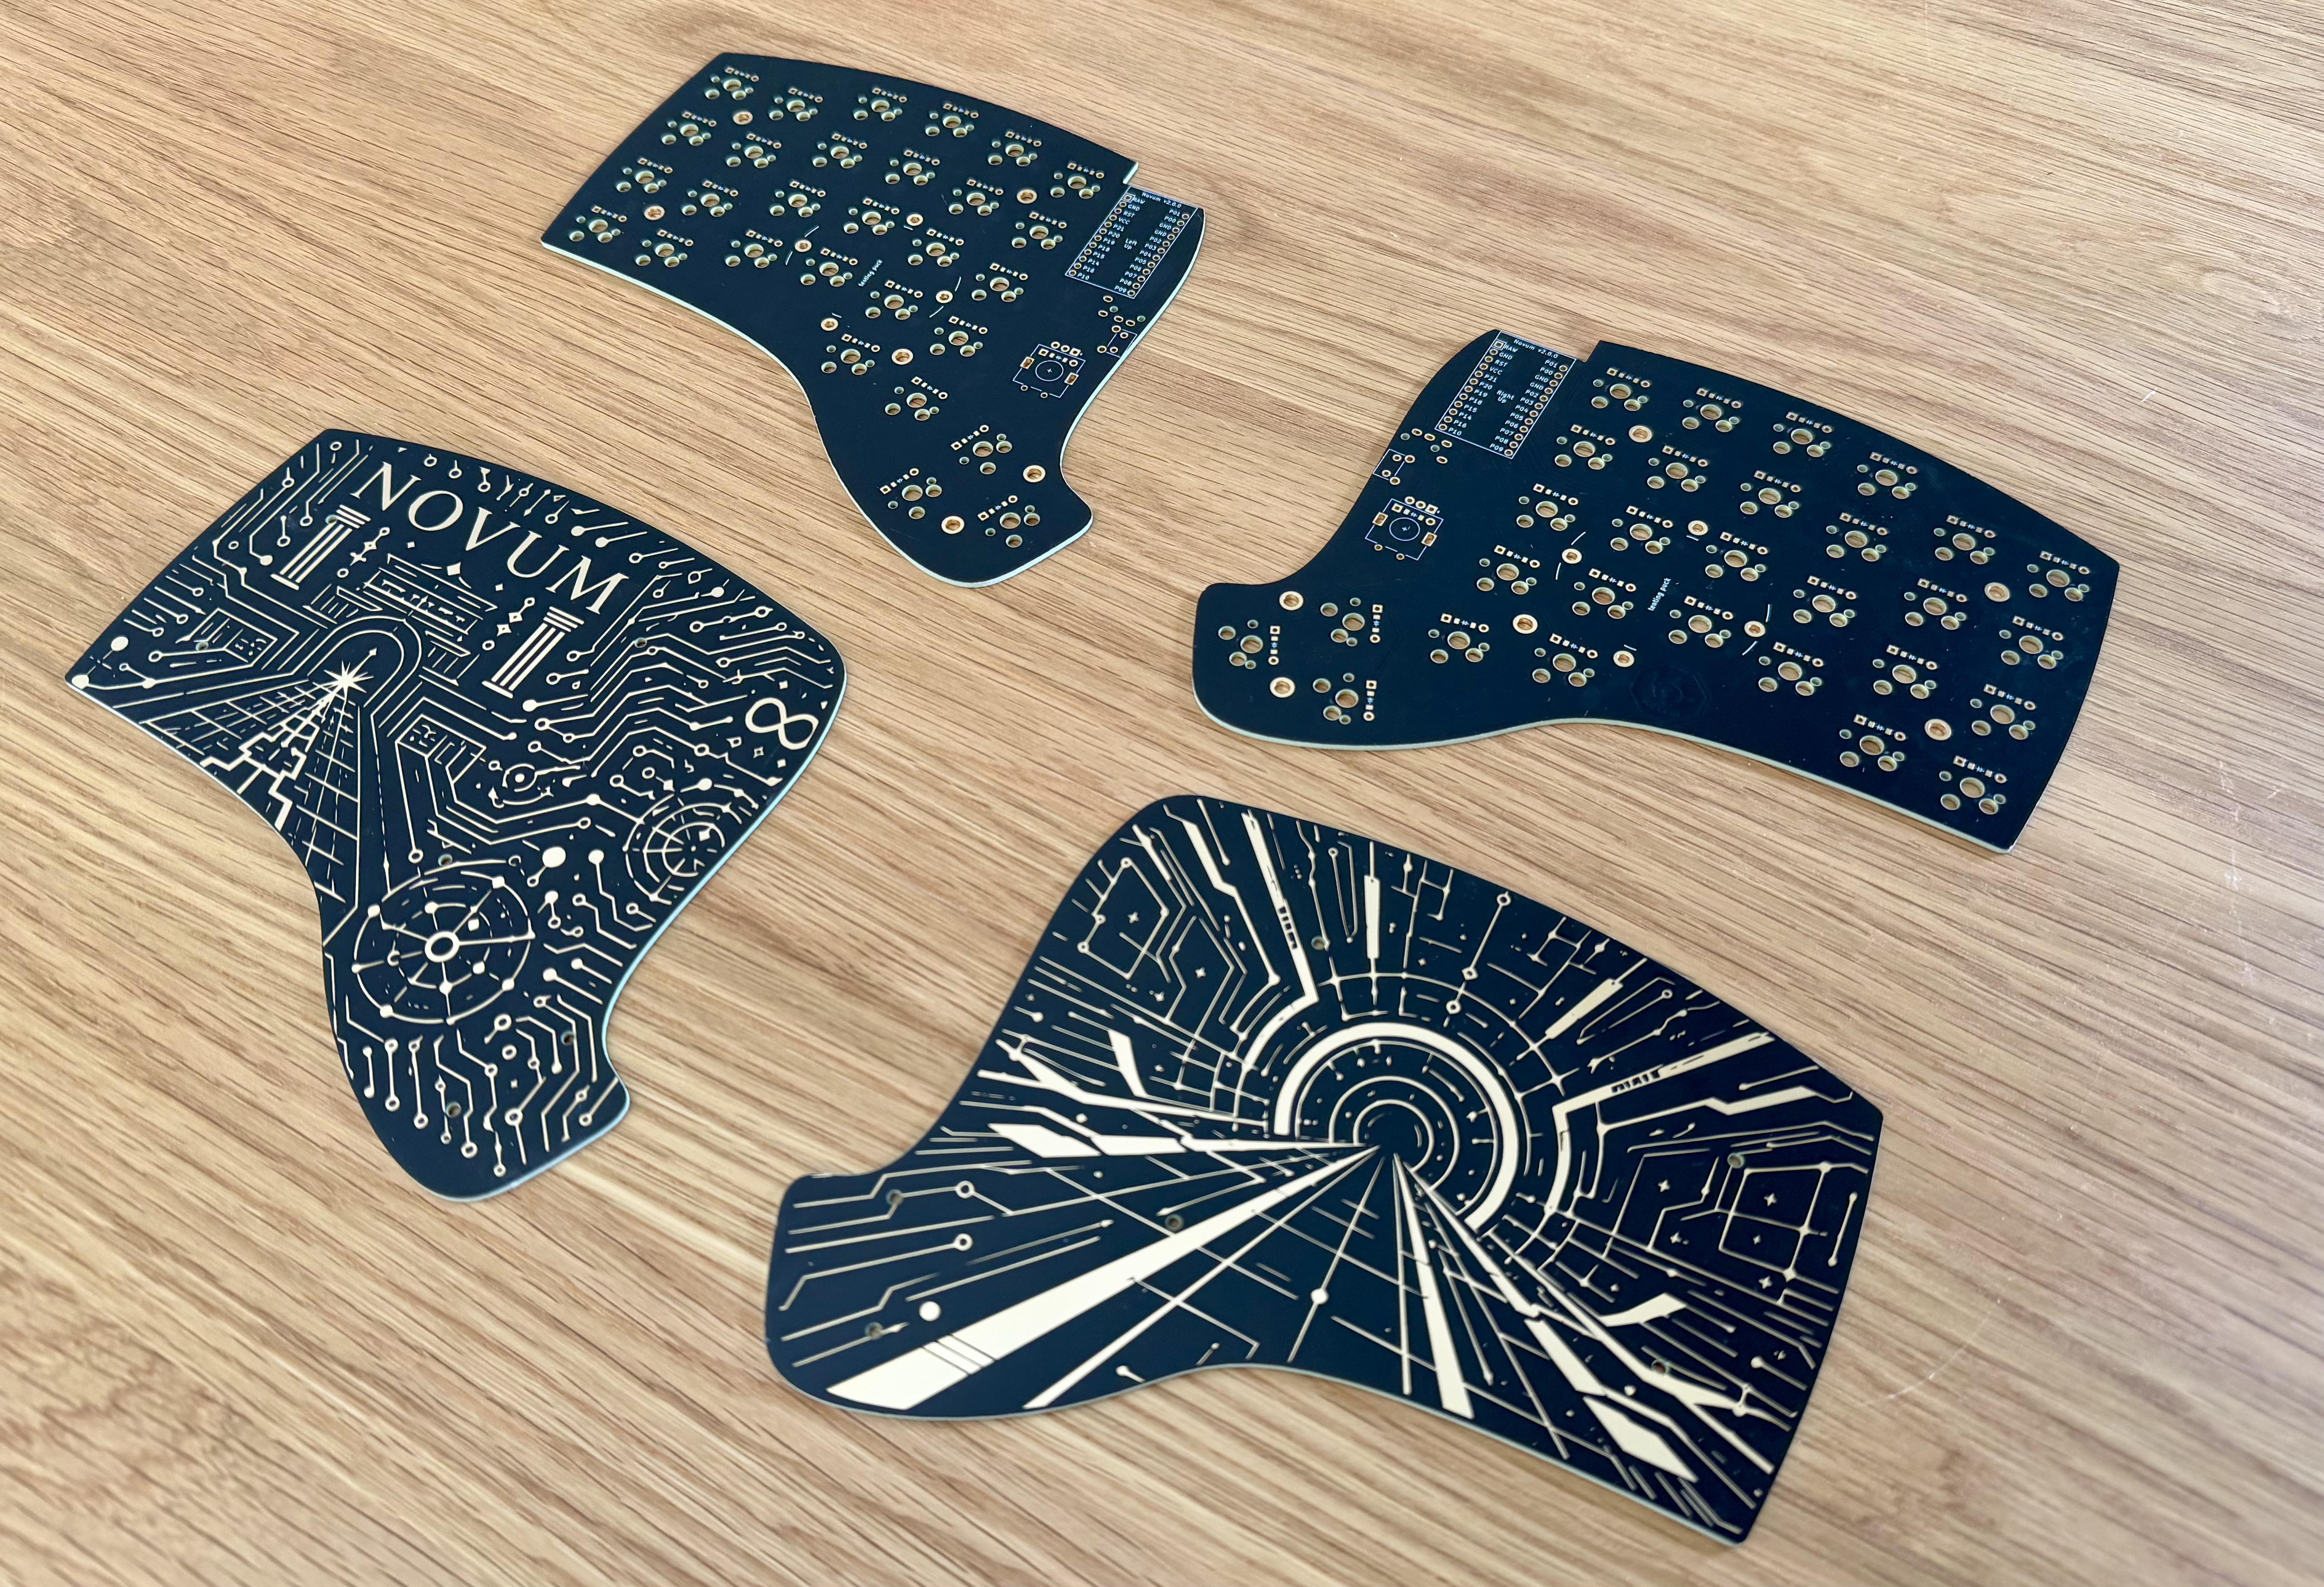 The rev2 PCBs.
I 3D-printed the switch plates this time. That let me add taller outer walls,
which close the gap that would otherwise be left between the main PCB and the
switch plate.
The rest of the build was not very interesting. I reused the keycaps from the
rev1 build for now, although I am still looking for a new set to get a fresh
look. I also stole the
GAZZEW Boba U4 Silent Tactile 62 g
switches from my Lily58 build.
Final Thoughts
Rev2 feels good. However, a few weeks of use is not the same as two years of
use. The thumb cluster change has fixed the obvious problem, and removing home
row mods has made fast shortcuts feel much more predictable. That is already a
positive result.
The next likely step is a proper enclosure. I did not want to design one before
knowing whether the new thumb cluster was worth keeping, so the 3D-printed
switch plates are a practical halfway point. If the layout keeps feeling right,
then a more complete enclosure makes sense.